Friday, September 11, 2009

Beef with Sweet Green Peppers and Onions - Stir Fry!

Since this was Aaron's recipe I'll leave this entry for him to fill :D

From Pepper Beef and Cucumbers


Ingredients:
Beef, celery, sweet pepper, onions, garlic, chilli peppers.

Preparation:
Marinate beef with some soy sauce and pepper and a little bit of vinegar overnight. This gives the beef some flavor on the inside and tenderizes it.

Cooking:
Wok optional, but I like it. Since I will be stirfrying it, and everything is going into the same wok, preparation is key. I wanted larger strips of beef, so I cut the strips fairly large across the grain. I also wanted the end result to be tender beef, so my first constraint is that I cannot cook the beef with too high a heat or for too long. My second constraint is the celery. I can't cook them as long as the beef or they'll be soft. I don't want them too raw either, because then they will not soak up much flavor and have a raw taste that will not go too well with the rest of the dish. I also chopped up a whole onion, some garlic, and diced some chillies super tiny. Now everything was ready to go.

Heat wok until coating smokes a little, then hit it with some oil and swirl it around, baking a new coating into the opened pores. First, onion, then garlic. A little salt and pepper. Exhaust fan on coz it's gonna get hot in here! Next, the beef. Brown the outsides a little, then lower the heat to simmer. I wanted to cook this slow. I covered the wok to help the beef cook faster. When the beef was 70% cooked, I added some sauces/spices from the rack: sesame oil, dark soy sauce, fish sauce, black pepper, sugar. Tossed in the chillies, celery and peppers. Raised te heat, wok'd them around, then turned the heat back down.

With the low heat and being covered, the water from the onions and celery and pepper and beef started to come out. This is a good thing because we like sauce/gravy. But I wanted more gravy and thicken it a little so I mixed some corn starch with some water and then tossed it in. I made sure to add a little extra flavor earlier, in anticipation that I would add more water now and that some of the flavor would dissolve into the gravy. I let it simmer uncovered so the sauce could thicken and the flavors could meld. At the end, wok it a little more and fix up the flavors to taste. Serve hot over rice.

BKT - Bah Kut Teh

BKT! Always so good and comforting. While visiting KL I tried Chinese herbal soups for the first time. These have found a special place in my heart and stomach hehehe. There were two that stayed with me, some herbal soup which came in a coconut but seems to be a concoction of the stall we ate it at and BKT which seems to be more traditional and thus a more commonly found recipe.

In its most simple incarnation you will find just a powder you can drop in your broth. One step up from there you will find the packets with the various dried roots, herbs, dates and mushrooms along with the powder that gives it its own very unique and delicious aroma. Finally, a Chinese herbal shop can also prepare a packet for you. Whether or not this would technically be BKT, I am not sure but all the ones which have come my way have been excellent.

The picture below shows one of the pre-made packets bought from one herbal shop which covered all the goodies. Some of the more expensive ones will throw in a big piece of ginseng as well. Good for your health!

The rest is extremely simple and delicious. I buy some pork ribs and a piece of tenderloin (as seen below). Proceed to cut the ribs in groups with no more than 3 ribs and cube the tenderloin. Place them all in a bug soup pot with the ingredients from the packet and a few garlic cloves and bring it up to a slow simmer. Depending on how early it starts to cook, the longer it can simmer the better. This will allow the flavors to combine and meld into the true goodness of a good herbal soup. Usually served with white rice, Chinese donuts, soy sauce and chilies. Since there is no salt added the soy sauce can be used individually to taste. As the fall comes in and we say our goodbyes to the summer this will be on my table more and more :).


From Bah Ku Teh

Steamed Fish


Last week I had happened to visit the store around early afternoon on a Saturday. This seemed to be the peak time for buying fresh fish. Never had such a crowd been gathered in that area while we'd been a the store. The decision was made there and then, a fish would be purchased the following week.

This week then would be the very first time I would have bought a whole fresh fish. After looking around at the different offerings we noted some cheaper, imported fish with a note reading "previously frozen". Those were out of the running. If fish was to be the meal of choice starting with the best available was the clear choice.

Tilapia is a tasty and forgiving fish and thus a tilapia was purchased. The lady behind the counter cleaned it up, wrapped it and the fish was officially in my possession. I snapped a picture while the guy told me to not take pictures and off we went to steam a fish.

Of course, Auntie was the clear choice when looking for advise on the proper cooking method. As advised the fish was cleaned (and yes by the pictures I know it still could have used a little better cleaning, next time!), rubbed with salt, sprinkled with some ginger and placed in the improvised steamer.

Here's what you need and how to do it:

- whole fish, cleaned and re-cleaned :)
- coarse salt for a good rub - inside and out
- about i'd say 1/4 to 1/2 of ginger sliced thinly

Procedure:
Clean the fish thoroughly. Rub it with salt inside and out. Place it in your steamer and sprinkle it with the ginger. If you don't have a steamer feel free to steal my improvised method. Grab your soup pot, place a small dish (dishwasher safe!) on the bottom and fill the bottom of the pot with water as much as you can without it going on your plate. Place the fish on the plate, sprinkle the ginger and set the fire to medium.

After it starts simmering, check around the 10 minute mark. If it does not look quite ready, leave it on the stove checking at 5 minute intervals. Once the flesh looks done remove it carefully (look at the head of my fish that's what happens when you don't remove it carefully hehe).

After it is done you can pour some soy sauce and sprinkle it with some chili peppers and garlic. I prefer to serve the garnishes on the side so everyone can add as much as they would like to have.

There's a delicious and healthy meal that you would like to make at least every once in a while after you try it out. Enjoy!


From Steamed Fish

Mofongo con pollo en fricase


Thursday, September 10, 2009

Friendly visitor

Just a few days ago, some aphids had infested the entire Cilantro plant with eggs (overnight!). I frantically doused the plant with soap+water and that successfully annihilated all of them by the next day. I squished their brown bodies and smeared their pulp all over the plant as a warning to future attackers. The following day, all the dead larvae had turned black. I decided to leave the dried, black corpses on there for whatever reason.
Yesterday, I spun Cilantro around and look what I found:

A ladybug! Predator of the aphid. It might have been attracted by the dead aphids. I hope it fed on some of them and laid many eggs to spawn an anti-aphid army.

Tuesday, September 8, 2009

Caramel Pistachio Cake!

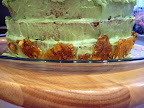
So this past weekend I thought it would be great to try and bake a cake. After my last attempt I was rather sad and unmotivated. Even though the cake tasted great, it sank in the middle and the frosting was a little too sweet/heavy. Recently on 'Ace of Cakes' (which I love to watch) they mentioned that their most popular flavor was pistachio caramel and that somehow sounded awesome. After exploring the internets for a while there was one recipe which stood out as simple and delicious. With a few changes of my own and some disclaimers on how making your own buttercream is never really simple, I give you the recipe and the finished result!


From Cakes

Tuesday, September 1, 2009

Housewarming Madness!

This past weekend we decided to have a party. I'm a big fan of housewarmings as they bring different groups of friends together and also serve as the official opening of the doors and welcoming to your friends at your new home. We ended up with about 20 friends in attendance starting from around 7:00pm until right before 4:00am.

There was no official theme but we did have some motivation. Serving some classical "party" food while introducing some dishes to share our cultural background. Some of these dishes are things that probably some of our guests wouldn't have had the chance to try otherwise. They also made for a very eclectic menu which required a lot of shopping, planning, prepping and scheduling.

In this post we'll outline the final menu, our schedule, Murphy's law, recipes and any other interesting facts that might come to mind!

Menu
Appetizers:
A1. Mel's famous (in the South Bay at least!) Pico de Gallo
A2. Guacamole (first time making this)
A3. Edamame

Main dishes:
M1. Pork Satay with Peanut Sauce (Malaysian Style!)
From Housewarming Party

M2. Churrasco con chimichurri (variation on your typical chimichurri)
M3. Cold Sesame Noodles (see previous posts)
M4. Empanadas Argentinas
M5. Piononos
M6. Couscous (thanks to Boris & Fam!)

Desserts:
S1. Oatmeal cookies with chocolate chips and walnuts
From Housewarming Party

S2. Cheesecake (bought it because no one can compete with Zanze's Cheesecake)
From Housewarming Party

S3. Mango Mousse (Sheng Kee bakery always for the win)
S4. Pumpkin Pie (home made by our friend Kathleen)

Drinks:
D1. Passion Fruit Sangria (one more from the Mel's famous list)
D2. Mint Chocolate Martinis (which ended up being more like a whit russian)
D3. Classic Mojito (cannot have a party without a rum drink when you are Puerto Rican!)
D4. Soy Milk with Pearls
From Housewarming Party

From Housewarming Party